Friday 26 March 2010

Fridays FCP- Final Cut Practice!

Today we looked at colour correction within FCP. To do this we took one of the group cooking projects to edit.
These are the steps we went though:

Firstly we went through the clip and made markers within the Viewer (if we had the original FCP file this would not have to be done), from this we were prepared to make subclips. It is useful to name the shots and add a description for future reference.


After doing this you can make subclips and set them up in a new bin within the browser...


Using these you can recreate the film in the timeline...


Once you have done this it is time to add the effects, for this exercise we are looking at colour and exposure correction so for this you need to use Color Collection 3-Way, when you arrange the windows you get different graphs to work with...


We will focus on using the waveform and vectorscopes and then we can edit the settings using the Color Corrector within the viewer.


You can keep an eye on what you are doing by comparing with other shots using the tool bench on the right hand side.

This is the result of our work this morning:

I have realised it is a very slow process doing this colour correction work, the clear way to make it easier on yourself is to set and keep correct exposures throughout filming. The more you do this the less editing work you will have to do later on in the process.

Wednesday 24 March 2010

Group Project: Progress Update


http://www.eden.co.uk/images/300/ACMGOSP1.jpg


We are deep in the depths of editing now and have been spending lots of extra time in the Gatehouse working through our footage trying to edit it down into something that resembles a structured documentary.

http://www.myleeneklass.co.uk/wp/wp-content/uploads/2008/05/lastchoirstanding_logo.jpg We have divided the roles of editing up between the three of us, I have been looking at what we have filmed and looking at editing Marks interview footage whilst Ed and Mike have been looking at the archive BBC footage from the DVD's Ed was given a while ago.
http://www.bbc.co.uk/programmes/i/512xn/20fe49d6ae7f1d03c87b782f2a6d3465656feb3c.jpg
I have been able to take the half an hours worth of footage with Mark down to around 10 minutes and after ruthlessly going through what he has said and structuring the narrative we want to end up with we are aiming to edit this down even further to around 5 mins. This will allow plenty of leeway to add other footage.

Over Easter we are hoping to film a rehearsal with the choir but with only 2 days left and other commitments with the other 2 modules, this is about where we leave it for this term. We are well on our way to having a finished product as we have structured our narrative, have near to all of our required footage and a strong idea of how we want to styleise the documentary :)

See you after Easter!

Friday 19 March 2010

Keyframing&Animation

Final Cut Pro 7 icon 


In todays session we had a go playing around with key framing to get a small animation done.
Using Final Cut Pro in particular the Viewer window you can edit the key frames to change certain settings of an image such as: Scale, Rotation, Center,  Anchor Point, Opacity and several other functions.


To get the image ready for using in the first place you must use Photoshop to edit the image so that it has no background by using layers and alphachannels.
Once the image is ready and saved as a photoshop file, it can be imported into Final cut to be used in combination with any images/moving image you may have.
I chose to keep my work simple but amusing and this is what I came up with:


It is a useful tool and I'm sure it will come in handy for creating interesting titles or short animation sequences in the future. It is quite difficult to get the knack of but once you know what you are doing and what you want to achieve it is quite easy to carry out....though often requires lots of waiting around for media to render!

Individual Project Time!


For the 4002 module we are required to make an individual project, it takes the same nature as the Group Projects in that it must be 5 to 8 minutes long and we pretty much have the choice to do whatever we want.

I want to go back to an idea covered earlier in the year of montage and develop this into moving image which I have not looked at before. As I like the idea of looking at traveling and taking journeys I have come up with the following proposal:

“The Journey” is a short (between 5 and 8 min) short film which will be a montage piece about a journey in car between Bristol and Scotland. It will be a majority of moving image but will also include some still photography.
The narrative of the film is already written in that the journey has a beginning and an end. The aim of the piece is to focus on aspects and scenery in our country to remind the audience of what we have in this country as the common assumption is that traveling involves going abroad.
I am as yet undecided on whether or not to include the driver as a character as nature is the main focus of my piece.
There will be no dialogue or diegetic sound and the footage will be accompanied by appropriate music to reflect the locations filmed and will be very atmospheric/ambient.
I have chosen to do this piece as this particular journey is one I have done several times and I find the changing of landscapes over the time it takes to complete the trip visually impressive. The differences in locations and also time of day over the length of the journey is something I wish to focus on.

Wednesday 17 March 2010

Group Project: Team Progress

http://filmschooler.com/wp-content/uploads/2009/12/04_12_12-Mini-DV-Digital-Video-Tape_web.jpg
So after last weeks filming we are left with over 2 hours of footage and the 'what next?' scenario...

We have managed to log and capture one and a half of our tapes (can never rely on technology!) and now we have to figure out what to do with the stuff we have.

Our approach now is to cut down the footage we have, we are going to take the half an hour or so interview down into somehting around 6 minutes worth of narrative. The logic behind this is that if we can structure Marks interview into around 6 minutes it gives 2 minutes either side to add or take away other footage.

This is our aim to be done by the easter holidays so that we have the main body of the documentary done. We are going to have one more filming session and then we have archive footage to encorporate in with what we already have.

Tuesday 16 March 2010

Instructional Video: Final Edit

http://webpages.csus.edu/~ejw25/index_files/chef-hat-with-ladel.gif 


As promised here is the final edit of our instructional cooking video filmed last week:


1..2..3.. cooking show from Anthony Sahdev on Vimeo.


Overall I am really happy with our video but if I were to approach the project again I would experiment with using a voice over as the projects I have seen by other groups have used this really well. I feel as though we have met the criteria of the task.
The thing I found difficult as I'm sure the rest of the groups did was many of the recipies could take anything up to or over 10 minutes to make in real life and having to condense that down into instructions of 3 minutes was quite hard.


I like the style we did our video in as if I were to be making the food I like not having the distraction of having a presenter and delivering short, clear instructions with simple visuals that are easy to follow.

Thursday 11 March 2010

Action!

On Monday we set out to do the main bulk of our filming for our group project. This is the story of our day filming...

We set off first thing in the morning and headed down the M4 to meet Ed at his house and head into Guildford and to ACM. After a quick cuppa and meeting Ed's dog we jumped into the car and made our way to ACM.

This is where we encountered our first problem, the woman who was meant to give us permission to film was ill. This meant we could still film but we couldn't get any of the exterior shots or anything containing logo's or much of the interior. We were allowed in a rehearsal room though which was where we spent some time filming 2 members of the choir Ricky and Emily.


We got some footage of them rehearsing a duet they had been working on which will be useful when it comes to reflecting on the choir members, this took quite some time and we probably wont end up using much of it but it does make good footage. The 2nd part of our time with them was an interview with them focusing on similar questions that we had written to ask music director Mark, this will prove more useful as we can use soundbites of their interview.

After this we headed over to Croydon to Mark's house, we chose to film here rather at ACM as it gives a more personal up close approach to the interview and being that the documentary is effectively his story we though it would be better. As it turned out his living room was all neutral colours and had good lighting which made a very good 'studio' for the filming.

During filming we had 2 cameras and one tripod. The way we set this up was to have one static camera, and one camera moving and changing angles to provide what we hope will make 'arty' shots for the interview sections. If we were to do it again we definitely would take a boom microphone to get better quality audio from the interviews to use as narration.

Though it may not seem like we did much we got a lot of useful footage and it is most of our filming done. Ed will go back in the next couple of weeks to film a quick few exterior shots, and we are hoping that the footage Ed took before will show up after being deleted off the computers.

On top of this we have plenty of archive footage to work with which will probably be included in the opening section of the documentary.

Though it was a long day filled with service station food and rush hour London traffic it was a very productive, useful and fun day!

Friday 5 March 2010

Storyboard

Another Friday brings another day preparing for filming. Though for our 4003 Group Production we are doing a documentary, it is still good practice and will be useful for future productions to look at storyboarding and the most useful way to go about doing this.


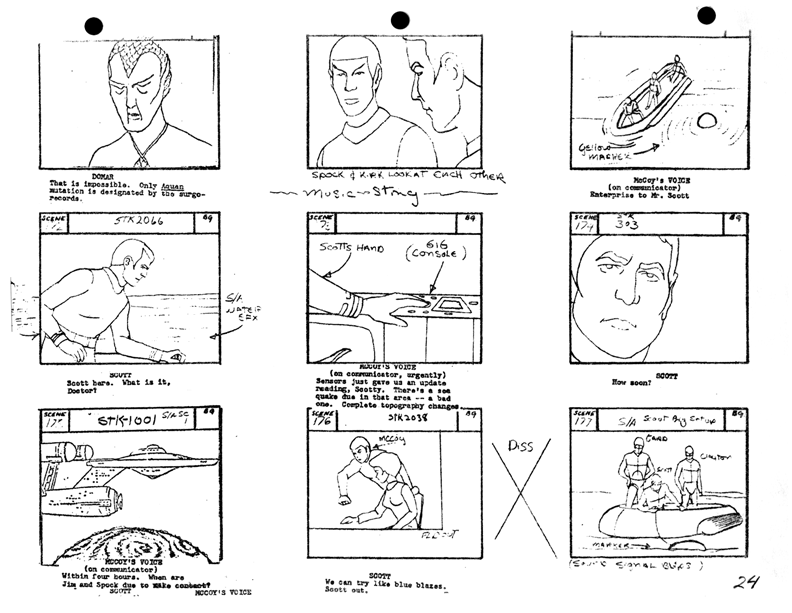
Though traditional storyboards are thought of as endless pieces of scibbly paper drawings, again we can use Celtx to create a more visual, tidy and portable storyboard for our productions. Today we were given a one scene script, and after finding the beats within the scene and deciding upon our shot types we took the Panasonic cameras out and shot individual pics for each shot to upload to Celtx.

 
Celtx allows you to upload each photo into its storyboard layout, select shot type from the drop down menu and add a short description of your shot. Once you have done this you can play these pictures within the programme as a slideshow which will include the short description as shown below:

For a more universal file format you could also use your sequence of images in Quicktime Pro, set how long you wish to spend on each photo and export it as a Quicktime Movie. The downside of this is you cant include the text but it does give you a good idea of how the scene will flow. This is what our images from this mornings exercise came to as an outline to the scene. (Please ignore my face at 10secs...Ed knows how to capture me at my worst obviously!)


The useful thing about making a storyboard in this manner is that is gives opportunity to practice the framing of shots without the actual actors having to be present. As you can see the photos don't need to be very precisely done and don't need to be well acted to give you an idea of what you want to include in a scene.

Wednesday 3 March 2010

Music Interview Research

Due to the unavailability of most of the members of ACM Gospel Choir we have had to push back our filming by one week. Though this in one respect is a pain, I feel it has given us more time to prepare for the interview with the Music Director Mark de Lisser, as it is the main spine of our documentary I am quite happy that we have been given more time to prepare for it.
We have the interview question pretty much sorted but it is the style of filming the interview that I feel needs more thought. For this I have been looking into existing examples of music based interviews.


The key thing I take from this interview with Paramore is that it looks like there is no one there asking the questions, it is the answers given by the band that form a the narrative of the feature.I like the camera style used on 4music, part of Channel 4 in particular their use of close up camera shots as it makes them seem more personal. I feel this is something we should aim to recreate in our filming. The intercutting of the interview with performance footage also reinforces the message that it is all about the music.


This second interview with Placebo (starting at 3.50) takes the one on one format but also has some interesting shots it is worth taking note of. The one thing I feel about this interview that would be hard to carry out ourselves but would be impressive if done properly is the fact that the camera is always moving, giving us constantly different angles of the interviewer and interviewee. This interview differs from the first also in that there is no background music so there is less distraction from Brian Molko's answers.


This third interview with Kings of Leon from the BBC at Glastonbury Festival has a more basic set up and is not set in studio has a more amateur look, only using one camera is still very personal in the way that the footage looks like something any one of us could film yet it is people we potentially idolise being filmed. The basic nature of the shot types and framing is something we can take note from when following choir members around and capturing impromptu footage.

Instructional Video Filming


http://ladiesdotdotdot.files.wordpress.com/2009/05/cooking.jpg


For the 4002 module, we have been asked to complete a short instructional video lasting aournd 3 minutes, aimed at students covering cheap and healthy eating.

I worked in a group with Ant, Harry and Simon, we filmed this afternoon in Ant's kitchen making a pasta dish.

The stages we went through in planning how to film the video was as follows:
  • Break down the recipe
  • Decide which order to film stages (e.g. all chopping to be done in one go)
  • Pre-plan certain shots
  • Work out timings of food being cooked
  • Film!
http://www.rottenrabbi.com/blog/images/AngryChef.jpg
The frustrating thing about trying to film a video cooking food is that either shots had to be rushed and several filmed in a short space of time or there is a lot of waiting around depending on what stage of the recipie you are at.
For example, we were cooking a pasta dish but preparing everything else within the recipe first, this meant that once we had done all the chopping and prepared all the sauce we had to wait just over 10mins for the pasta to cook before we could continue with filming. This does give time to review the work done so far but the waiting around can be annoying!
http://www.gloriahansen.com/weblog/wp-content/uploads/2008/03/egg_timer.jpg
Also, depending on the type of recipe there is a pressure to get everything right first time. For example when filming ours we only had enough spinach for one 'batch' so if we had messed up or something had gone wrong with the shot of cooking spinach it would have proved rather difficult.

I have learnt that cooking videos are not as easy as they look and they take a lot of scheduling when you cant afford to or dont have the resources to make multiple versions of the dish. Programmes like Ready, Steady, Cook! and the live sections of Saturday Kitchen have the pressure of getting everything right for live audience, but a pre-filmed cooking video has the same problem and requires a lot more preparation than I originally thought.

Stick around for the edit!

Tuesday 2 March 2010

Scriptwriting

http://images01.olx.in/ui/2/44/39/16223539_1.jpg
 There are many formatting basics when it comes to script writing, for example all scripts are written in with the same layouts using the same size font. From this rule it makes it easy to estimate how long the final film will be, it is a vague rule that each page will equal one page of action.


This is not a strict rule as for example the Avatar script is around 150 pages long but is longer than 150mins.

Other basic key rules about script formatting:
  • Character cues in the middle of page in capital letters
  • Info in brackets gives more personal direction to characters
  • Column dialogue when more than one character speaks at once
  • If listing a series of visual shots, number then describe
  • Font= Courier 12pt
  • DON'T number scenes
  • Title scenes: INT/EXT, Location, Time of Day
Scripts for Hollywood flicks can be found on websites such as SimplyScripts.com

Again we can use the ever useful Celtx for editing screenplays and scripts. Here is an example of the work you can do with a few clicks of the TAB button:

From this:


To this:


Instantly the script becomes far easier to read and easy to distinguish between action, dialogue, screen directions etc.

The guide we looked at about scriptwriting written for BBC website can be previewed/downloaded here.